farmblog towards actually sustainable farming in Ahualoa

March 3, 2024

Unloading a biochar pit with a vacuum

Filed under: biochar,tools — ben @ 5:06 pm

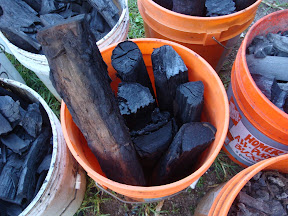
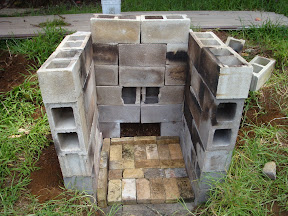
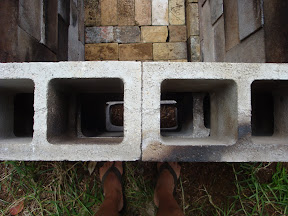
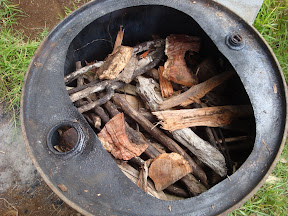
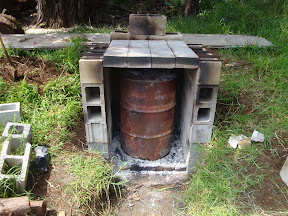
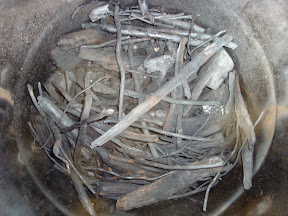
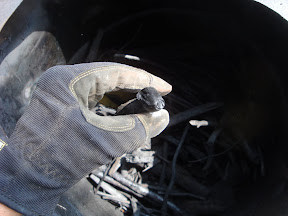
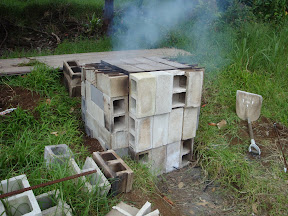
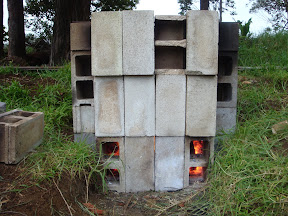
Lots of people make small batches of biochar in kilns, retorts, rings and pits. To move the char, most people shovel it out. When your batches of char get bigger, unloading is a lot of time and energy. How to improve that?

There are two main challenges: moving the char out of the kiln, and getting it to the desired size.

One option for moving the char is to use a kiln vessel, off the ground, that can be tipped to pour its contents out. This isn’t an option for those of us using pits or rings, or much larger metal vessels. For these, the main options are shoveling the char out, or sucking it up with a large vacuum.

It might be possible to find a grinder that you can shovel char directly into, which would grind it to the desired size (such as 1/2″-) without clogging or jamming or letting larger chunks through. It could then drop directly into the wheelbarrow, supersack or wherever you want the char to go. However, I have not yet found such a grinder to exist. Small shredders (leaf shredders, sink grinders) jam easily, have to be tended carefully, and are slow. Big hammer mills don’t readily jam, but pulverize the char to fine dust. In both cases, the moisture level has to be just right, or you get dust clouds (too dry) or a sticky slurry (too wet).

One option, that accomplishes both moving and crushing, is mentioned in the following video, from a farm in 2013:

https://youtube.com/clip/Ugkxk1v48cfHk11YydSC-zOSjTUwFHFxekec?si=O7zONl9wjCjbr7Sp

“About scale, a better way to crush the char, well we operate on such a big scale that we can afford to use one of these, basically its a leaf vacuum, we jump in there and we vacuum it out, and it grinds it on the way out, and we capture it in those giant super sacks. We vacuum it through a chopper.”

Further clarified, this farm uses a complete set of machinery:

Bob Wells: “The unloader that we build for the retort that you are referring to is run on a 14 HP gas engine and it is basically a slightly overbuilt centrifugal fan/blower/vacuum. The biochar is sucked right through the stainless impeller and smashed as it goes through. It is immediately blown from there to a cyclone separator that drops the char into a container. There is also an adjustable water jet built into the housing of the blower just before the impeller,so that we can add just enough water to knock down the dust. It only takes 10 minutes to unload the retort. […] it doesn’t crush the biochar to a uniform or controlled particle size. That requires another step. We use a hopper fed trommel to sort out the size fractions. Any oversize particles go into a finger type crusher that gives us perfectly sized biochar”

This sounds very powerful and convenient, but requires a long chain of equipment – huge vacuum, separator, water jet, hopper-fed trommel, finger-type crusher. Some of these can be bought (certainly large debris loaders exist, and cyclonic separators are common) but some parts have to be custom built, experimentation and welding is required, and the whole chain adds up to a major commitment of time and money – certainly tens of thousands, if not hundreds of thousands of dollars.

What can be done on a more moderate budget? Or closer to turnkey, instead of years of experimentation?

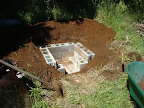
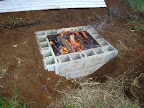
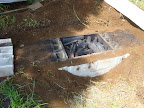
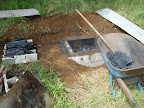
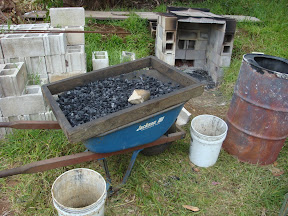
I bought a powerful leaf blower, which can function as a vacuum, with a force of “up to 473 CFM” (Makita XBU04ZV, $276 on sale via Amazon.com, usually ~$400) and a cyclonic separator (Oneida Dust Deputy 2.5 Deluxe, $140 plus shipping). I took them to my kiln pit, and tried to suck up biochar. This is what I learned.

  1. Charcoal in pit -> hose -> separator -> vacuum. This kinda worked at first. The separator did a good job of separating, with the char getting sucked up the hose, then dropped by the separator into a bucket. However,
    • It soon jammed, because large chunks got sucked up and stuck in the hose.
    • It was fairly slow. Might work better with a more powerful vacuum.
    • Lots of the chunks getting sucked up are bigger than desirable.
  2. Charcoal in pit -> sieve -> hose -> separator ->vacuum. This solved the problem of large chunks coming up the tube, but it was even slower, because I had to continuously move the hose with sieve around in the charpit. This was disappointing, because I had high hopes for this approach.
  3. Charcoal in pit -> hose -> vacuum -> bucket. This uses the vacuum’s own impeller to break up the char, and spit it out the back into a bucket. However,
    • Again, the hose jams with larger chunks.
    • It comes flying out the back at such high speed, it’s basically blowing out dust. The impeller is doing too good a job at breaking up the char. Maybe a large dust bag would work for catching the output without reducing airflow too much.

To be fair to this Makita vacuum, it’s made to suck up leaves, and it expects to suck them up the included straight tube, so they’d be much less likely to get jammed. However, to use it that way, I’d have to wear the vacuum, aiming the straight tube down into the pit. That seemed too awkward, which is why I tried using a vacuum hose instead, only to find the curves in the hose jammed far too easily. These vacuum hoses are made for wet/dry shop vacs, which usually only suck up dust, not 1″ lumps of charcoal. In the video above with a farm using a vacuum, there are two key differences, their hose is much larger diameter (probably 8″ vs. 2.5″), and the suction is much higher (a 14 HP gas engine vs. the Makita’s motor which is probably ~1 HP).

Things I could still try:

  • Using a bigger hose. 4″ diameter hose is available and that matches the in/out ports of the Makita. It’s not a cheap experiment, though. It would also involve a bigger cyclonic separator, a 4″ is available for a few hundred bucks. I suspect it would work better and jam less, but still suffer from overall slow throughput.
  • Using the straight hard tube, wearing the vacuum. I’m not optimistic about the ergonomic usability of that approach.
  • Try a bigger vacuum – like a gas-powered debris loader. A good one costs at least $2k. A reasonable cost, if it works well, or an expensive experiment if it doesn’t.
  • Give up on vacuums completely, and just shovel it out of the pit, into a hopper, where it drops through an appropriate grinder. The search for such a grinder continues.

September 1, 2020

Biochar pit volumes, and prices

Filed under: biochar — ben @ 10:40 pm

Concerning volume.  In my previous biochar post, I summarized that my two rectangular lined pits were producing around 1.3 cubic yards of char per firing.  Since then, I’ve been told that a simple earthen pit could produce as many as 5 yd3 in a single firing!  Let’s calculate how large that would be.

A round pit with a flat bottom is basically a truncated cone, which is like this but upside down:

5 cubic yards is 135 cubic feet. To be able to step down into the pit, I don’t imagine it being much deeper than 3′ deep (my current pits are around 2′ deep, and it’s quite a step to get in/out of them).  Considering a truncated cone 3′ deep, with 4′ diameter at the bottom, and a 7′ diameter at the top, that’s only 73 ft3.  That isn’t even considering compaction (char settles, so that as you walk on it and unload, it packs down, so the entire pit is not full of char).  To get to 5 yd3 = 135 ft3, you’d need a pit 3′ deep, 5′ bottom diameter, and 10′ top diameter!  That’s a huge area to build a fire in.

What if we kept the current approach of a lined pit, but allow for sloped sides, and deeper, and wider?  The sloped sides would allow for better aeration, allowing us to go deeper.  The shape would be like this, upside down:

With a depth of 2.5′, a bottom of 3×3′, and a top of 5×5′, that’s… only around 31 ft3, and considering compaction, probably more like 25 ft3.  That’s not much better than my current “big” pit of 20 ft3, while being deeper to step into, and a much larger area to have to cover with soil.

There’s just no way around it.  To get a lot of char, you need a really massive pit, regardless of shape, or whether it’s dirt or bricks.

Meanwhile, concerning price, I haven’t actually found anyone on the Island of Hawaii selling bulk char.  Retail, all I’ve found is at Farm Supply Coop in Hilo, as of July, they were carrying cubic-foot bags of Black Owl biochar for $42 (!)  The price is similar on Black Owl’s website.  At this price, the 34.6 ft3 of char that my pits are producing would be $1453, which is crazy.  I don’t think there are many people willing/able to pay so much.  Currently, I’m only charging $30 for a 10-gallon (1.33 ft3) bag for the 1/2″-minus char that I screen by hand.  This screened char is around 2/3 of the total output, but our own farm needs a lot, so it’s more like 1/3 leftover to sell (11.5 ft3), which is only around 8 bags per burn.

July 10, 2019

Biochar pit sizes and volume of production

Filed under: biochar — ben @ 12:14 am

It’s been seven years since I posted anything to this blog, but it’s a reasonable place to put things I’ll want to refer back to, so…

There are currently two biochar pits. Pit 1 is the original, and Pit 2 (built July 2015) is a larger pit which incorporates lessons learned from the first pit. I always fire both together.  When the pit is fired then opened up later, there is a gap at the top with air and a few chunks of wood that were not fully charred, which are removed, leaving a depth of char which is less than the depth of the pit.  Here are both pits, freshly opened, with the torrefied wood still in place:

And Pit 2, emptied:

Width (inches) Length Depth Depth of char Cubic inches Cubic feet Cubic yards Liters
Pit 1 29 53 23 16 24592 14.2 0.53 403
Pit 2 31 63 25 18 35154 20.3 0.75 576
Total 59746 34.6 1.28 979

In terms of carbon, it is difficult to say how much C is present in this partly-crushed, loose char. A solid block of charcoal, a web search indicates, might be 13 lbs/ft3. Another source, biochar-specific, says it could vary widely from 5 to 20 lbs/ft3. Using a value of 10, that gives 346 lbs of carbon, equivalent to 1270 lbs of CO2.  By a (similarly, very rough) approximation of the carbon footprint of air travel, at 1 lb CO2/mile, a flight from Hawaii to California (~2400 miles) would require two complete firings of the charpits to offset the flight emissions, or four complete firings for a round trip.  This analysis does not include the other (relatively small) carbon costs of the charpits, including per-burn costs (small amounts of gasoline for chainsaw and log-splitter) and amortized costs (footprint of the bricks used to build the pits).

In terms of time and money, looking around on this island, the approximate price of biochar is $150 per cubic yard.  (That equals $5.55 per ft3, so a 5-gallon bucket (0.67 ft3) would be $3.70.)  At that price, the pits produce $192 worth of char.  Firing the pits takes around 4.5 hours (can be anywhere from 4 to 5 depending on many factors).  There is also time spent unloading, as well as gathering, cutting, splitting, and moving the wood to the charpits; these hours are harder to estimate but we can imagine another 3 hours per amount of wood that goes into a firing.  That gives around $25/hour for the 7.5 hours of labor involved in each batch of char.

September 17, 2012

Farm visit: pictures, lots of work done, rotary sifters

Filed under: biochar,tea — ben @ 7:04 pm

Tons of work got done during the 3 weeks there, including:

  • Took down and partly processed 6 very large cypress trees above the tea field
  • Started new long-term compost pile
  • Planted several dozen new tea plants, mostly Y/Y cultivars
  • Lots of wood moving and splitting
  • Re-built the char pit with real firebrick, which should last forever
  • Several burns of the char pit.

Lots of thinking about how to make the process easier, mostly in the sifting-crushing-sorting.  Right now i am thinking about building a low-tech Rotary Sifter, something like this. Combined with some kind of crushing phase, with gravity to assist in moving char through the process, i think this would radically increase the amount of finished fine char per hour of work.

Update: it turns out that what i’d like to build is called a Trommel.

August 20, 2012

Farm visit fall 2012

Filed under: biochar,stuff,tea — ben @ 2:55 pm

I’ll be back on the island from August 24 – September 15 – to work on the farm, plant tea plants, split firewood, make compost, make biochar, and experiment with lots of cool stuff like making native bricks and larger and better biochar production techniques. I’ve also just bought a GoPro and Steadicam so i hope to make some videos about all of the above. Stay tuned!

August 18, 2012

More on Tea & Biochar in Sri Lanka

Filed under: biochar,tea — ben @ 7:16 pm

More about growing tea with biochar in Sri Lanka, from an eariler comment on this blog.

1. “Biochar: Can it put the tea industry back in the black?”, Dr. J.C. Krishnaratne, http://www.sundaytimes.lk/120624/business-times/biochar-can-it-put-the-tea-industry-back-in-the-black-3850.html
In summary, it says that the Sri Lanka tea fields are in bad shape due to erosion and long-term overuse of chemical fertilizers, that biochar can and should help, and that char could be made out of the Gliricidia trees that are already quite widespread and grow well in that region.

2. A response to the above article by Hemal de Silva, http://dl.dropbox.com/u/52700813/Biochar.pdf
In summary, he says that while biochar is certainly good for tea soils and yields, the economic situation is more complicated, lack of re-investment money means biochar may not be sufficient to solve the industry’s money-losing problems, by itself. He suggests that looking at particular tree species, Pentadesma butyracea and Garcinia indica (Kokum) might provide a better economic result.

I was unaware of the economic picture and have never heard of these tree species, so it’s very interesting.

November 10, 2011

Biochar and Tea

Filed under: biochar,tea — ben @ 10:26 am

I spent the month of September 2011 back on the farm, getting it into shape and making batches of biochar.  At the end of the month i took a truckload of the char down to Josiah’s biochar operation in Puna, where it was inoculated and ground up.  Back at the farm, the living char was spread all over, especially in the tea field.

To date, there has only been two studies of biochar on tea that i know of: some Japanese work back in 1997-2003, and my own postings on this blog.  Today, i heard of a third study: Using Biochar to Improve Soil Health and Leaf Production at Tea Plantations in Sri Lanka.  It’s early, but very positive, just as with the studies here and in Japan.

September 26, 2010

Farm biochar flowchart

Filed under: biochar,chickens,crops,food — ben @ 9:11 am

How does biochar fits into our farm?  I scribbled a flowchart onto paper, and today put it into the computer; it looks like this:

Ideally, it’s a continuously flowing cycle; there is no “waste” and no need for unsustainable inputs; that’s the goal.  The chickens provide meat and eggs to the humans, and poop to the compost cycle; the biochar stabilizes the nutrients in the urine and compost, making them plant-available longer.  You can see how the compost pile is the engine in the middle of everything.

August 2, 2010

Biochar: from kiln to pit

Filed under: biochar — ben @ 12:29 am

Those of you following the biochar-hawaii list know that i’ve stopped using my kiln, and am now focused on making biochar in a pit. This is both for reasons of scalability and wear; my 55-gal steel drum kiln/retort could only make ~23-gal of char, and the surrounding kiln blocks cracked from repeated heating.

Hence, a pit. Mine is lined with blocks for clean char and easy unloading. Continuously fed wood, pyrolysis occurs at the air-starved bottom of the pile, gradually the pit fills up, then i cover and let it cool for a day, before opening and scooping out the finished char:

That first small pit worked well, so i made it bigger and sure enough, it scales well:

Width Length Depth Gallons Cubic feet # of blocks Gallons of Char
24 32 16 53.2 7.11 33 16.5
32 48 16 106.4 14.22 48 34
32 48 24 159.6 21.33 60 68
32 48 24 On second burn: 82

That 82-gallon operation took 2.5 hours to do the burn, then 2.25 hours the next day to unload, crush, sort, sift, and load into buckets. That’s 82/4.75 = 17.25 gallons of char per hour of work. That’s not bad, given that i’m working with some cheap concrete blocks, a piece of old corrugated roofing, and a shovel. With more money and technology, like a continuous pyrolysis machine, you could certainly get vastly more char per hour of labor, but those machines start at $100,000. I’m feeling quite happy about my pit. The Biochar2010 album has all the pictures.

I gave a biochar talk to the Kona Coffee Grower’s Association on June 2. 10 minutes of that talk got uploaded to YouTube. I then addressed the Hawaii Tropical Fruit Growers on July 19, that time with a fancy presentation with charts and pictures. Next will probably be an evening talk in Waimea on August 8, and then a 1-day workshop on making and using biochar here at our farm, date TBA.

May 29, 2010

Biochar kiln progress

Filed under: biochar — ben @ 10:57 pm

I recently did a second and third burn in my biochar kiln, tweaking each time. The story is best told in pictures:


Upon detailed inspection, the April test burn actually gave good results. Four white buckets are completely charred material, two orange buckets incomplete, one mixed and one of material from the surrounding fire.


Completely charred wood from retort, and the incompletely charred – only a small amount, and generally from the bottom of the barrel, perhaps due to a lower temperature there.


Preparing for burn #2, using smaller wood and some changes to the kiln.


Added a layer of firebrick at the base. Ideally, it should enclose the whole chamber, but that would take a lot of actual masonry.


More air inlets, allowing air into all four corners.


The ‘chimney’ is formed by the blocks themselves.


Smaller wood scraps for burn #2.


Opening the kiln after burn #2.


As before, the material at the bottom of the barrel (top, when inverted like this) is less charred, but everything above (below) it is completely charred


Much of the sticks that look brownish on the outside are actually completely charred black on the inside


Burn #3


Got the fire real hot this time, you can clearly hear the “whoosh” of the pyrolysis gasses from the barrel joining the fire


Sifting/crushing/sorting the result. Some 1/2″-minus has direct uses. The rest will soak in nutrients to charge it, then goes through the chipper-shredder to make “charged fines” – biochar fertilizer.

Older Posts »

Powered by WordPress